
From EncyclopAtys
| Line 13: | Line 13: | ||
|location2=Zora | |location2=Zora | ||
}} | }} | ||
| + | |||
| + | Magnetic Cartography is one of the 8 [[occupations]], and one of the 2 thought by the [[Zoraï]]. Of those two, it is the easier profession, taking place in the normal regions of the [[Witherings]]. It mostly involves running to different places to take readings, and delivering reports to cartographers. The consumables created by this occupation give a bonus to health and stamina regeneration. | ||
| + | [[Image:Cartography-icon.jpg|right|Magnetic Cartography]] | ||
==Special Item== | ==Special Item== | ||
| + | [[Image:Cartographer-special.jpg|right|Amber of Protection]] | ||
'''Amber of Protection''' | '''Amber of Protection''' | ||
| − | |||
*Prevents the loss of elements if an improvement action fails. | *Prevents the loss of elements if an improvement action fails. | ||
*Is automatically used if you have one in your inventory while you fail an improvement action. | *Is automatically used if you have one in your inventory while you fail an improvement action. | ||
*Is used up in the process. | *Is used up in the process. | ||
| − | ==Mission 1== | + | ==Mission 1 of grade 1== |
| − | Run to different places in [[Cities of Intuition]] to measure the magnetic field there. There are 4 locations. You need only arrive at the location (indicated on your compass) to complete the mission. Each time you do you'll receive a '''Fragment of Magnetic Fields Map''' | + | [[Image:Cartographer-component1.jpg|right|Fragment of Magnetic Fields Map]] |
| − | *'''Magnetics Measuring Area A:''' Fragment of Magnetic Fields Map | + | Run to different places in [[Cities of Intuition]] to measure the magnetic field there. There are 4 locations. You need only arrive at the location (indicated on your compass) to complete the mission. Each time you do you'll receive a '''Fragment of Magnetic Fields Map''' and a location-specific quest item needed for mission 2: |
| − | *'''Magnetics Measuring Area B:''' Fragment of Magnetic Fields Map | + | *'''Magnetics Measuring Area A:''' Fragment of Magnetic Fields Map + Analysis Result |
| − | *'''Magnetics Measuring Area C:''' Fragment of Magnetic Fields Map | + | *'''Magnetics Measuring Area B:''' Fragment of Magnetic Fields Map + Sealed Letter |
| − | *'''Magnetics Measuring Area D:''' Fragment of Magnetic Fields Map | + | *'''Magnetics Measuring Area C:''' Fragment of Magnetic Fields Map + Letter |
| + | *'''Magnetics Measuring Area D:''' Fragment of Magnetic Fields Map + Copy of the Map | ||
Once you arrive at the location, you'll be randomly send to a new location (which might be the same location again). You can also drop and retake the mission from Reka Qe-Wung at any time to get a new random location. | Once you arrive at the location, you'll be randomly send to a new location (which might be the same location again). You can also drop and retake the mission from Reka Qe-Wung at any time to get a new random location. | ||
| − | ==Mission 2== | + | At higher grades, you will be send to higher level regions of the [[Witherings]]. |
| − | This is where you hand the quest items from mission 1 over to Cartographers located in [[Zora]]. For every item handed over you'll receive a '''List of Magnetic Amplitudes''' | + | |
| + | ==Mission 2 of grade 1== | ||
| + | [[Image:Cartographer-component2.jpg|right|List of Magnetic Amplitudes]] | ||
| + | This is where you hand the quest items from mission 1 over to Cartographers located in [[Zora]]. For every item handed over you'll receive a '''List of Magnetic Amplitudes''' in return. Every cartographer requires it's own specific item: | ||
*'''Cartograper (Goo Chase)''' requires Analysis Result. | *'''Cartograper (Goo Chase)''' requires Analysis Result. | ||
*'''Cartograper (Win-Cho)''' requires Sealed Letter. | *'''Cartograper (Win-Cho)''' requires Sealed Letter. | ||
*'''Cartograper (West Hollow)''' requires Copy of the Map. | *'''Cartograper (West Hollow)''' requires Copy of the Map. | ||
| − | *'''Cartograper (Daïsha)''' requires Letter. | + | *'''Cartograper (Daïsha)''' requires Letter. |
The mission randomly sends you to one of these cartographers, and you can only hand an item over to the cartographer that the mission sends you to. Once you hand over an item to this cartographer, you'll be randomly send to a new cartographer (which might be the same cartographer again). You can also drop and retake the mission from Reka Qe-Wung at any time to get a new random cartographer. So if you've lots of Letters to hand in, you can abandon and retake the mission over and over until you get the mission to talk to Cartograper (Daïsha). | The mission randomly sends you to one of these cartographers, and you can only hand an item over to the cartographer that the mission sends you to. Once you hand over an item to this cartographer, you'll be randomly send to a new cartographer (which might be the same cartographer again). You can also drop and retake the mission from Reka Qe-Wung at any time to get a new random cartographer. So if you've lots of Letters to hand in, you can abandon and retake the mission over and over until you get the mission to talk to Cartograper (Daïsha). | ||
==Created Item== | ==Created Item== | ||
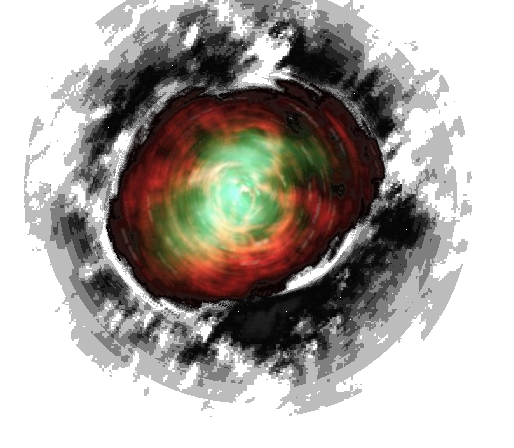
| + | [[Image:Cartographer-yield.jpg|right|Map of Minor Magnetism]] | ||
Using 4 Fragment of Magnetic Fields Map and 4 List of Magnetic Amplitudes, you can create a Map of Magnetism. | Using 4 Fragment of Magnetic Fields Map and 4 List of Magnetic Amplitudes, you can create a Map of Magnetism. | ||
Revision as of 17:50, 29 May 2010
| Amber of occupations | |
| Magnetic Cartographer | |
 | |
| Going to different areas of magnetism and transmit reports to cartographers in Zora | |
| Master | Reka Qe Wung |
| Type of Activity | Exploration |
| Difficulty | + |
| Special Item | Amber coating that prevents the loss of elements used in a failed improvement |
| Yields | Magnetic cards that will give a short but powerful bonus to endurance and life |
| Mission 1/2 | |
| Tasks | Go in different areas of measurement of magnetism in the Witherings. Handouts are received to give to agents in Zora |
| Location | The different regions of the Jungle |
| Mission 2/2 | |
| Tasks | Give document to different agents in Zora |
| Location | Zora |
Magnetic Cartography is one of the 8 occupations, and one of the 2 thought by the Zoraï. Of those two, it is the easier profession, taking place in the normal regions of the Witherings. It mostly involves running to different places to take readings, and delivering reports to cartographers. The consumables created by this occupation give a bonus to health and stamina regeneration.
Special Item
Amber of Protection
- Prevents the loss of elements if an improvement action fails.
- Is automatically used if you have one in your inventory while you fail an improvement action.
- Is used up in the process.
Mission 1 of grade 1
Run to different places in Cities of Intuition to measure the magnetic field there. There are 4 locations. You need only arrive at the location (indicated on your compass) to complete the mission. Each time you do you'll receive a Fragment of Magnetic Fields Map and a location-specific quest item needed for mission 2:
- Magnetics Measuring Area A: Fragment of Magnetic Fields Map + Analysis Result
- Magnetics Measuring Area B: Fragment of Magnetic Fields Map + Sealed Letter
- Magnetics Measuring Area C: Fragment of Magnetic Fields Map + Letter
- Magnetics Measuring Area D: Fragment of Magnetic Fields Map + Copy of the Map
Once you arrive at the location, you'll be randomly send to a new location (which might be the same location again). You can also drop and retake the mission from Reka Qe-Wung at any time to get a new random location.
At higher grades, you will be send to higher level regions of the Witherings.
Mission 2 of grade 1
This is where you hand the quest items from mission 1 over to Cartographers located in Zora. For every item handed over you'll receive a List of Magnetic Amplitudes in return. Every cartographer requires it's own specific item:
- Cartograper (Goo Chase) requires Analysis Result.
- Cartograper (Win-Cho) requires Sealed Letter.
- Cartograper (West Hollow) requires Copy of the Map.
- Cartograper (Daïsha) requires Letter.
The mission randomly sends you to one of these cartographers, and you can only hand an item over to the cartographer that the mission sends you to. Once you hand over an item to this cartographer, you'll be randomly send to a new cartographer (which might be the same cartographer again). You can also drop and retake the mission from Reka Qe-Wung at any time to get a new random cartographer. So if you've lots of Letters to hand in, you can abandon and retake the mission over and over until you get the mission to talk to Cartograper (Daïsha).
Created Item
Using 4 Fragment of Magnetic Fields Map and 4 List of Magnetic Amplitudes, you can create a Map of Magnetism.
Maps of Magnetism can only be used while sitting down, and they activate both an aura that increases your life regeneration and an aura that increases your stamina regeneration for a short time. Beware: Using this item disables all your other auras for a short time. If you recently used another aura and it's still on cooldown, using this item will not have any effect, but the item will still be consumed.
The most basic form is the Q10 Map of Minor Magnetism. It takes 1 second to consume, and the aura activated provides +100 life regeneration and +200 stamina regeneration for 10 seconds to the user and all teammates within a radius of 10 meter. It disables all auras for the user for 20 seconds, and prevents teammates from benefiting from the same aura again for 60 seconds.