From EncyclopAtys
m |
(Correct ways to obtain guild points) |
||
| (18 intermediate revisions by one other user not shown) | |||
| Line 8: | Line 8: | ||
|palette=Alert | |palette=Alert | ||
}}</noinclude> | }}</noinclude> | ||
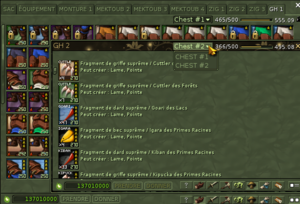
| + | [[File:Patch994-2024-06-17-IGH2.png|thumb|right|Inventory : Easily organize your GH (2 chest we can rename)]] | ||
| + | Guild chests <ref>Chests were added on June 12, 2024, in [[Patch 00994]]. See [[Patch 00995]]-997 too.</ref> not only increase the storage capacity of the [[Guild/Hall|Hall]], but also enable better organization. | ||
| − | |||
| − | |||
| − | ==== Chests in brief ==== | + | ===== Chests in brief ===== |
* Each chest has 500 slots and a ''variable'' volume capacity. | * Each chest has 500 slots and a ''variable'' volume capacity. | ||
* You can have a maximum of 20, built from your [[Guild Island]]. | * You can have a maximum of 20, built from your [[Guild Island]]. | ||
| − | * They can be named (e.g. LA, HA, weapons, jewelry, mats...). | + | * 10,000 slots now available instead of 1,000 ([[Guild/Guild chests/Api|see the Ryzom API for chests note]]). |
| − | * Each | + | * Each chest has its own configuration : |
| − | + | ** They can be named (e.g. For my lovely Chief, LA, HA, weapons, jewelry, mats...). | |
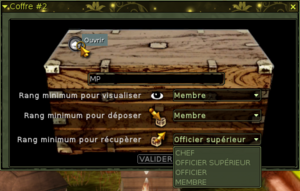
| − | + | ** Each has 3 permissions: who can '''see''' the contents, who can '''deposit''' in the chest and who can '''take''' from the chest. For each permission, you can choose between Members (i.e. everyone), Officer, Senior Officer, Chief. | |
| + | Notes: | ||
| + | * If members can't see the contents of a safe, they can't deposit items in it either. | ||
| + | * Only one chest may be reserved for the Chief. | ||
| + | * Only Chests that are not at maximum capacity '''have a button for enlarging them''' (i.e. from the 3rd trunk upwards). | ||
| − | We start with 2 free chests, which we can spawn and rename. The first is the contents of the guild hall, the second is empty and available. | + | It '''double the Hall capacities''': |
| − | You can store either from your [[Guild/Hall|GH]] or from your [[Guild/Island|island]] or near your OP. | + | * We start with 2 free chests, which we can spawn and rename. The first is the contents of the guild hall, the second is empty and available. |
| + | * You can store either from your [[Guild/Hall|GH]] or from your [[Guild/Island|island]] or near your OP. | ||
| − | ==== Add a chest ==== | + | However, to build them or modify their configuration, you need to visit your [[Guild/Island|guild island]]. |
| + | |||
| + | |||
| + | Images are under [[:atys:Category:Guild Chests]]. | ||
| + | |||
| + | ===== Add a chest ===== | ||
Prerequisite: | Prerequisite: | ||
* Go to your [[Guild Island]]. | * Go to your [[Guild Island]]. | ||
| − | + | * Have in bag sup mats (q50 at beginning, from all [[New Lands]], from [[Harvesting]] or hunted [[Bosses of Atys]]), give [[elyps]] to your guild and [[Guild/Guild Points|Guild Points]]. | |
| − | * Have in bag | + | |
| − | [[ | + | {{TheBigBox |
| + | |type=R | ||
| + | |title=Guild Points | ||
| + | |image=Tb guild.png | ||
| + | |palette=Status | ||
| + | |content=Your guild can earn [[Guild/Guild Points|guild points]]: | ||
| + | * by going to the scouts or hunters and obtaining the list of Kings in the area, and | ||
| + | * by completing daily quests (up to 7 for the guild in total per day).<br /> | ||
| + | * by defeating the Nexus outposts once per week (for 2,4,6 or 8 guild points respectively, total of 20). | ||
| + | The new official '''[[Apps/MyGuild|MyGuild app]]''' shows which regions have already been obtained (among others). | ||
| + | |align=left | ||
| + | }} | ||
| + | |||
| + | Build your 3rd chest (the 2nd is free): | ||
| + | * If you haven't already done so: spawn the Intendant, then hire the [[Guild_Island#The_Countermaster|Countermaster]] (and spawn him - he'll build the chest). | ||
| + | |||
| + | <gallery> | ||
| + | Patch994GI-2024-06-19-FRMenuContremaitre.png|Counter-master Menu for Chest #3 | ||
| + | FRChest5Crea-2024-06-26-withI.png|Countermaster Menu for Chest #5, with inventory I | ||
| + | Patch995GI-2024-06-19 13h-BuildChest20.png|Build the Chest #20 | ||
| + | </gallery> | ||
<blockquote> | <blockquote> | ||
# Get elements from supreme materials (any ecosystem) from [[Harvesting]] | # Get elements from supreme materials (any ecosystem) from [[Harvesting]] | ||
| Line 35: | Line 65: | ||
# Get chests from elements | # Get chests from elements | ||
</blockquote> | </blockquote> | ||
| − | + | ||
| + | '''Place''' the chest: go to where you want to add the chest (on your island), then in the Guild window (G), Island tab, right-click on the "Chest 2" icon. | ||
[[File:Patch994-2024-06-17-G-Island-Chest2PopMenu.png|thumb|center|Spawn a chest on your [[Guild/Island|Island]]]] | [[File:Patch994-2024-06-17-G-Island-Chest2PopMenu.png|thumb|center|Spawn a chest on your [[Guild/Island|Island]]]] | ||
==== Options, configuration ==== | ==== Options, configuration ==== | ||
| − | Each chest have its own configuration. | + | Each chest have its own configuration. If you physically move a chest to the island, it retains its name and other properties. |
The chest must be in front of you, open it: [[File:Patch994-2024-06-17-G-Island-Chest2-renamed.png|thumb|center|Configuration (renamed and permissions]] | The chest must be in front of you, open it: [[File:Patch994-2024-06-17-G-Island-Chest2-renamed.png|thumb|center|Configuration (renamed and permissions]] | ||
| − | + | ||
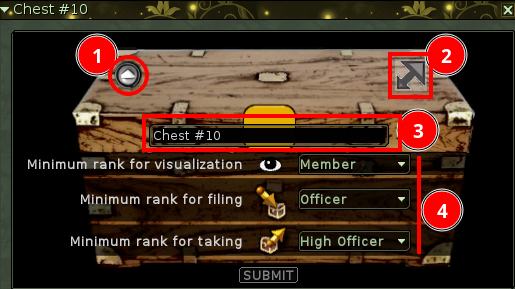
[[File:Patch995GI-2024-06-19 14-ChestInterface.png|frame|center|2 to increase volume]] | [[File:Patch995GI-2024-06-19 14-ChestInterface.png|frame|center|2 to increase volume]] | ||
<blockquote><poem> | <blockquote><poem> | ||
| Line 51: | Line 82: | ||
4: Manage permissions | 4: Manage permissions | ||
</poem></blockquote> | </poem></blockquote> | ||
| + | |||
| + | ====== Increasing maximum trunk volume ====== | ||
| + | '''From the 3rd trunk only''', since the first two trunks are offered in maximum size. | ||
| + | |||
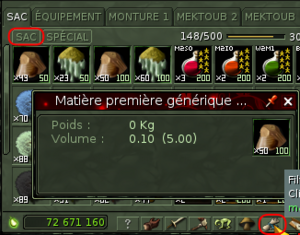
| + | We'll often have to use this ⓶ button (image above)...I usually have the inventory open, with the "mission items" filter. | ||
| + | |||
[[File:Patch997GI-2024-06-19 15h-ChestVol.png|frame|center|[[Dappers]], [[Guild/Guild Points|guild points]] and mats]] | [[File:Patch997GI-2024-06-19 15h-ChestVol.png|frame|center|[[Dappers]], [[Guild/Guild Points|guild points]] and mats]] | ||
| − | Note: | + | Note: Augments must be purchased one after the other. |
| + | |||
| + | Intermediate items (soft/liquid or hard generic mp) are stored in its Inventory: | ||
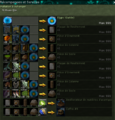
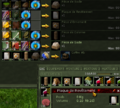
| + | [[File:FR-ChestExtend-2024-06-26-I-Mission.png|thumb|center|Inventory, mission filter: and q100 element's properties]] | ||
| + | So we can exchange them :) | ||
| + | |||
| + | ==== More with arrays ==== | ||
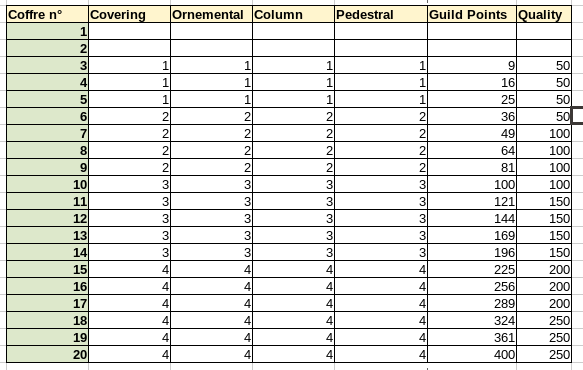
| + | Note: the quantity and quality of items, as well as the amount of guild points required, increases with the number of chests already in place. Here are the quantity tables: | ||
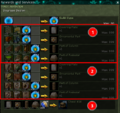
| + | [[File:Patch995GI-2024-06-19 14h-QuantityTab.png|frame|center|Resources needed to build 20 chests on your island]] | ||
| + | |||
| + | Note 2: As the guild point limit is currently 200, it is not possible to obtain more than 14 chests. This limit will be increased at a later date. | ||
| + | |||
| + | Source: https://app.ryzom.com/app_forum/index.php?page=post/view/210133 of June 23, 2024. | ||
| + | |||
| + | |||
| − | |||
Here are the volumes of the 20 chests: | Here are the volumes of the 20 chests: | ||
{{:Guild/Guild chests/VolumeArray}} | {{:Guild/Guild chests/VolumeArray}} | ||
| + | |||
| + | ==== How to manage [[Guild/Guild chests/Api|chests via the ryzom api]] ==== | ||
| + | {{:Guild/Guild chests/Api}} | ||
| + | |||
| + | |||
| + | ------------------------------------- | ||
[[Category:Glossary]] | [[Category:Glossary]] | ||
Latest revision as of 07:02, 2 September 2024
Guild chests [1] not only increase the storage capacity of the Hall, but also enable better organization.
Contents
Chests in brief
- Each chest has 500 slots and a variable volume capacity.
- You can have a maximum of 20, built from your Guild Island.
- 10,000 slots now available instead of 1,000 (see the Ryzom API for chests note).
- Each chest has its own configuration :
- They can be named (e.g. For my lovely Chief, LA, HA, weapons, jewelry, mats...).
- Each has 3 permissions: who can see the contents, who can deposit in the chest and who can take from the chest. For each permission, you can choose between Members (i.e. everyone), Officer, Senior Officer, Chief.
Notes:
- If members can't see the contents of a safe, they can't deposit items in it either.
- Only one chest may be reserved for the Chief.
- Only Chests that are not at maximum capacity have a button for enlarging them (i.e. from the 3rd trunk upwards).
It double the Hall capacities:
- We start with 2 free chests, which we can spawn and rename. The first is the contents of the guild hall, the second is empty and available.
- You can store either from your GH or from your island or near your OP.
However, to build them or modify their configuration, you need to visit your guild island.
Images are under atys:Category:Guild Chests.
Add a chest
Prerequisite:
- Go to your Guild Island.
- Have in bag sup mats (q50 at beginning, from all New Lands, from Harvesting or hunted Bosses of Atys), give elyps to your guild and Guild Points.
Guild Points
- by going to the scouts or hunters and obtaining the list of Kings in the area, and
- by completing daily quests (up to 7 for the guild in total per day).
- by defeating the Nexus outposts once per week (for 2,4,6 or 8 guild points respectively, total of 20).
Build your 3rd chest (the 2nd is free):
- If you haven't already done so: spawn the Intendant, then hire the Countermaster (and spawn him - he'll build the chest).
- Get elements from supreme materials (any ecosystem) from Harvesting
- Get items from hunting supreme materials (any ecosystem)
- Get chests from elements
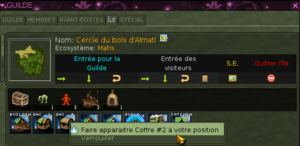
Place the chest: go to where you want to add the chest (on your island), then in the Guild window (G), Island tab, right-click on the "Chest 2" icon.
Options, configuration
Each chest have its own configuration. If you physically move a chest to the island, it retains its name and other properties.
The chest must be in front of you, open it:
1: Display trunk contents
2: Increase trunk volume (only available if trunk is not at maximum)
3: Rename trunk
4: Manage permissions
Increasing maximum trunk volume
From the 3rd trunk only, since the first two trunks are offered in maximum size.
We'll often have to use this ⓶ button (image above)...I usually have the inventory open, with the "mission items" filter.
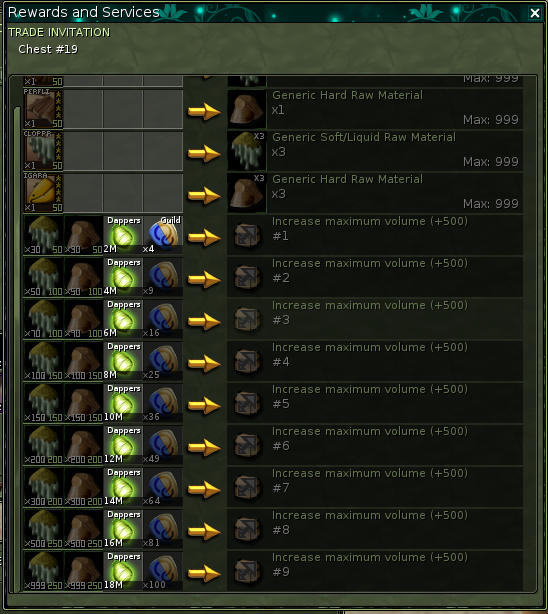
Note: Augments must be purchased one after the other.
Intermediate items (soft/liquid or hard generic mp) are stored in its Inventory:
So we can exchange them :)
More with arrays
Note: the quantity and quality of items, as well as the amount of guild points required, increases with the number of chests already in place. Here are the quantity tables:
Note 2: As the guild point limit is currently 200, it is not possible to obtain more than 14 chests. This limit will be increased at a later date.
Source: https://app.ryzom.com/app_forum/index.php?page=post/view/210133 of June 23, 2024.
Here are the volumes of the 20 chests:
| Chest # | Cost Guild points | Initial volume | Max volume | Cost Mat quality | Cost pieces per type | Header text | Header text | Header text |
|---|---|---|---|---|---|---|---|---|
| 1 | free | 6000 | 6000 | - | - | - | Example | Example |
| 2 | free | 6000 | 6000 | - | - | - | Example | Example |
| 3 | 9 | 500 | 5000 | 50 | 1 | Example | Example | Example |
| 4 | 16 | 500 | 5000 | 50 | 1 | Example | Example | Example |
| 5 | 25 | 500 | 5000 | 50 | 1 | Example | Example | Example |
| 6 | 36 | 500 | 5000 | 50 | 2 | Example | Example | Example |
| 7 | 49 | 500 | 5000 | 100 | 2 | Example | Example | Example |
| 8 | 64 | 500 | 5000 | 100 | 2 | Example | Example | Example |
| 9 | 81 | 500 | 5000 | 100 | 2 | Example | Example | Example |
| 10 | 100 | 500 | 5000 | 100 | 3 | Example | Example | Example |
| 11 | 121 | 500 | 5000 | 150 | 3 | Example | Example | Example |
| 12 | 144 | 500 | 5000 | 150 | 3 | Example | Example | Example |
| 13 | 169 | 500 | 5000 | 150 | 3 | Example | Example | Example |
| 14 | 169 | 500 | 5000 | 150 | 3 | Example | Example | Example |
| 15 | 225 | 500 | 5000 | 200 | 4 | Example | Example | Example |
| 16 | 256 | 500 | 5000 | 200 | 4 | Example | Example | Example |
| 17 | 289 | 500 | 5000 | 200 | 4 | Example | Example | Example |
| 18 | 324 | 500 | 5000 | 250 | 4 | Example | Example | Example |
| 19 | 361 | 500 | 5000 | 250 | 4 | Example | Example | Example |
| 20 | 400 | 500 | 5000 | 250 | 4 | Example | Example | Example |
How to manage chests via the ryzom api
Chest information is available in the ryzom api with the inventory module enabled.
The guild inventory works as before, except that it has 10,000 slots available instead of 1,000.
Each chest corresponds to a segment of the inventory:
- Chest 1 : slots 0-499
- Chest 2 : slots 500-999
- Chest 3 : slots 1000-1499
- Chest 4 : slots 1500-1999
- ...
All you have to do is filter the slots according to the inventory you have chosen.
It's not impossible that an additional parameter will be added to allow the trunk to be selected, thus reducing the time taken to load data from the api.
For example: https://api.ryzom.com/guild.php?apikey=XXX&chest=2
Source : Patch 2024-06-12: Extended guild inventories
- ↑ Chests were added on June 12, 2024, in Patch 00994. See Patch 00995-997 too.


